/// BUILDING THE ESP32 RECON RIG FOR REAL
Building the ESP32 recon rig for real
The parts, the wiring, the flashing and the mistakes behind the ESP32 wifi rig, plus the scope rules that keep it a lab project instead of a problem.
The driver post was about the kernel refusing to let the board talk. This one is the build: what to buy, how it is wired, how it flashes, and the things that wasted an evening. It is the IKEA instruction manual of wifi hardware, except the allen key is a USB cable and the missing screw is your evening. It is written for a board pointed at your own network, and the rules for that are on the lab rules page.
What the rig actually is
An ESP32 dev board with a 2.4 GHz radio and a USB serial link. The firmware puts the radio into monitor mode, prints what it hears, and can transmit test frames at your own access point. Nothing exotic. The interesting fight is in the software, which is why the driver post is longer than this one.
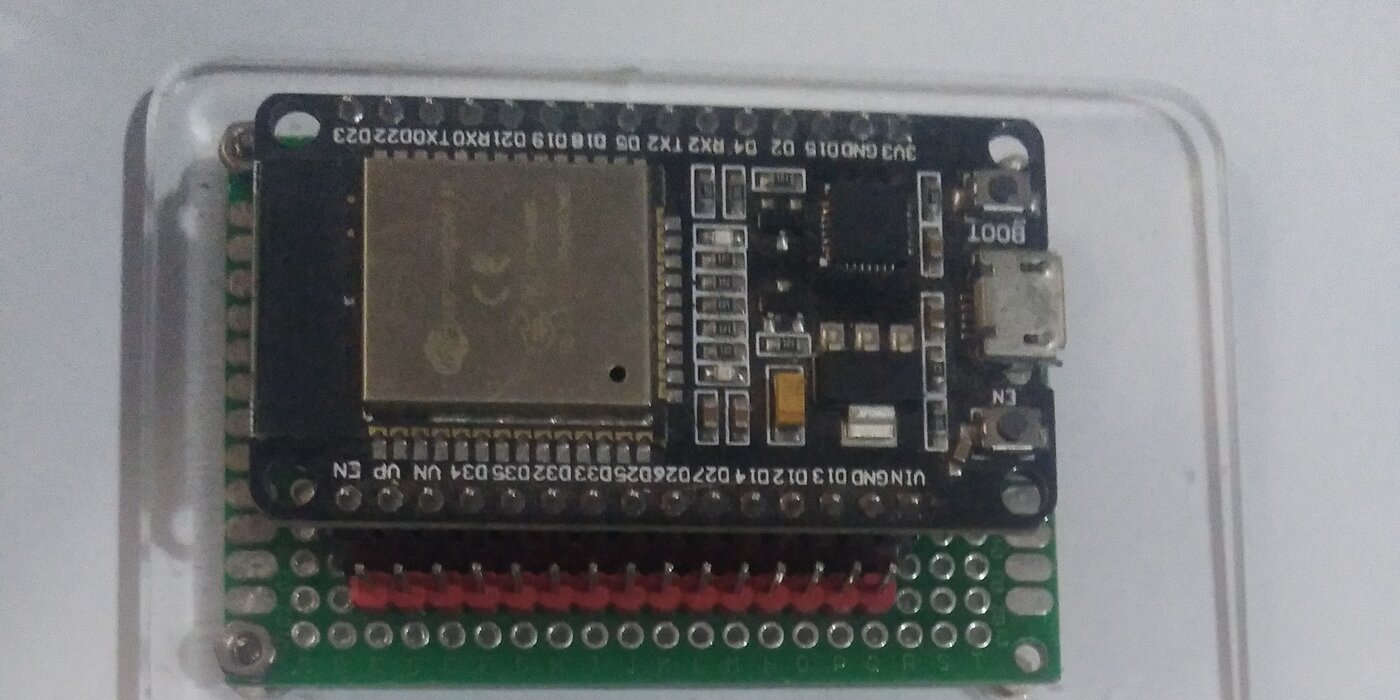
Bill of materials
- An ESP32 DevKitC or any WROOM-32 board with a USB port. The CP2102 and CH340 USB chips are both common and both work once the driver exists.
- A USB cable that carries data. Charge-only cables are the classic hour-long bug, and they look identical to working ones.
- Optional: a u.FL pigtail and a small antenna if your board exposes the connector. Also optional and fragile.
- Optional: an 18650 cell, a TP4056 charger and a 5 V boost module for a portable rig. Not needed for desk work.
- A case is optional. A label is not.
Power
USB 5 V is enough. The radio pulls short spikes of a few hundred milliamps when transmitting, so a weak hub or a long thin cable can brown the board out mid-capture. If the board resets exactly when it transmits, suspect power before firmware. On battery, the boost module has to survive the same spikes.
Flashing
esptool handles flashing. Hold BOOT, tap EN, release BOOT, then flash. If it says it failed to connect, one of three things is true: the board is not in download mode, the cable is charge-only, or another program is holding the port. Close the serial monitor first. That last one catches people for an hour because the error says nothing about it.
On Linux the board shows up as /dev/ttyUSB0 for a CP210x or CH340, or /dev/ttyACM0 for native USB. The kernel may claim the device before your tool does, which is the whole plot of the driver post.
The wiring
Bare board, USB, antenna, done. The only wiring is optional: battery to the boost input, boost output to the 5 V pin, common ground. Do not feed 5 V into a 3.3 V pin. Do not power from USB and the battery boost at the same time unless the board is designed for it. The magic smoke is easy to release and hard to put back.

Antenna habits
The PCB antenna is fine for a desk. Keep it away from metal and away from your hand, because 2.4 GHz is absorbed by water and you are mostly water. If you use u.FL, the connector has a rated number of mating cycles and it is smaller than it looks. Do not tape foil to the board and call it a reflector. It changes the antenna in ways you cannot predict without a meter you do not own.
Lessons that cost time
- Label the board with its MAC. You will end up with two boards and no idea which is which.
- Keep one known-good data cable in the bag and never use it for charging.
- If the monitor is open, the port is busy.
- A board that drops off is usually power or the cable, not the firmware.
- Log everything from the first run. The interesting frame is always the one that scrolled past while you were reading the previous one.

Scope, once
Transmitting deauth or beacon frames at equipment you do not own is a denial of service and illegal in most places. The lab rules page is not decoration. Point the rig at your own access point, or at gear you have written permission to test, and the project stays a lab project. The receiving half is safe almost everywhere. The transmitting half is where you need to know your local law and your own boundaries.
Build it, break it, log it, fix it. That part is legal and it is most of the education.